Lists
Contents
Overview
A list is a group of objects (either domains or products) that you create for any reason. Often lists are created to track prospects. Lists can be created in a few different ways:
- Saved search
- Manually adding a store to a list
- Uploading a list of domains
Domain Lists
The following sections describe functionality related to a list of Domains (ie. stores).
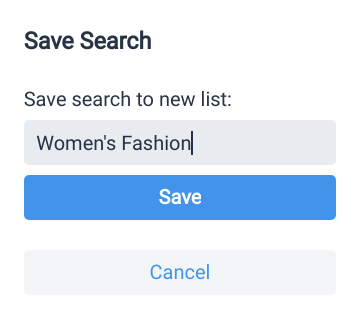
Creating A Domain List By Saving a Search
This is the most common way to create a list and it results in a list that is dynamic, meaning that the stores within the list change as data changes. Every week, thousands of new stores are added and removed from the database and store data is constantly changing. Saving a search to a list ensures that the list will always contain stores that match your search criteria.
To save a domain search to a list, you can click the star icon at the top of the search filters on the Domains page.

You'll be asked to provide a name for the new List.
Creating A Domain List By Manually Adding A Store
To add a store to a list manually, go to the List tab of the Domain details view and click the Add to List button.

You'll be asked if you want to add the store to an existing list or create a new one. If a store belongs to a list, you also have the option to remove the store from the list.
Unlike dynamic lists created by saving searches, lists that are created by manually adding stores are static. The stores in the list do not change unless you manually add or remove stores from the list.
Uploading A List Of Domains
It's also possible to create a list by uploading a CSV file that contains a list of your own domains.
These lists are also static and do not change unless you manually add or remove stores from the list.
Enriching the Uploaded File
Once you have uploaded a file, you will see an option to download an enriched version of the file. This option is available for 30 days after the file is uploaded. After that, the file is removed to ensure that we don't keep a copy of your data around forever.

When you click this button, you'll be asked which columns to include in the export. The selected columns will be added to your original file.
See All Lists
To see all your existing lists, go to the List page.
The List page shows all your lists. You may even notice some special lists (called "Favorites" and "Notes") that are automatically created for your account to keep track of stores that have been favorited and stores for which you have written a note respectively.
When you click on a List, you'll see details for the list. The List Detail view also lets you perform tasks like renaming or deleting the list.
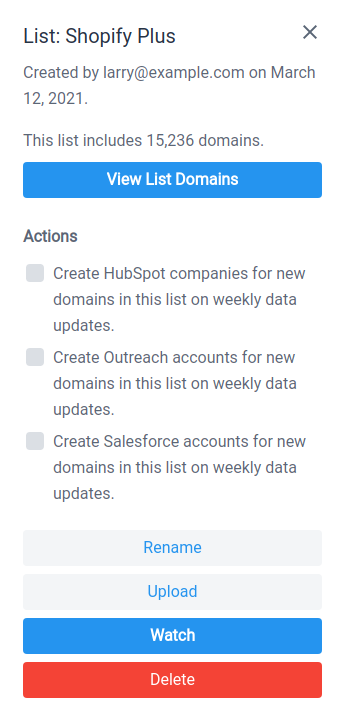
Synchronizing A Domain List With Your CRM
One of the most important features of Lists is the ability to synchronize lists to your CRM.
As an example, let's say that you have created a list through a saved search that identifies your most promising prospects. You'd like these prospect to always exist in HubSpot so that your sales team can reach out to them. This can be done as a one-time import into HubSpot or Store Leads can be configured to automatically import all stores matching the list after every weekly update.
One-time Import
To do an immediate on-time import into your CRM, click on the relevant tab on the List detail page and click the "Create in ... now" button. Note that you must first enable a CRM integration to use this feature.
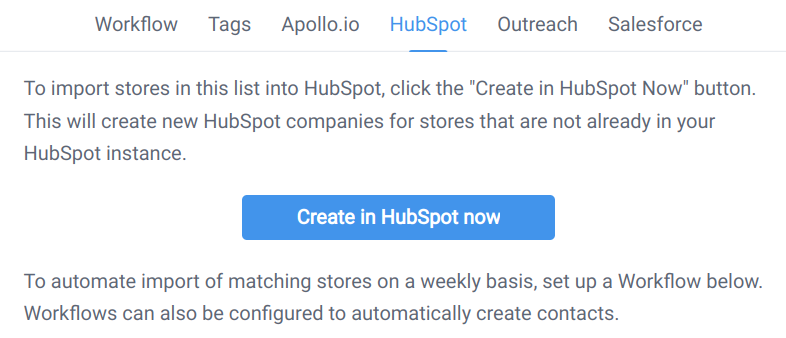
Automatic Weekly Imports
To automatically import stores matching a list into a CRM on a weekly basis, configure a Workflow for the list.
Workflows
Workflows allow you to configure automatic actions on stores matching the List. These actions are triggered automatically after our weekly data updates.
Most of the time, you'll want to create a workflow on a list that has been created by saving a search. Those list are dynamic and change automatically every time we do our weekly data updates. List that are created by manually adding domains (or uploading a CSV file) are less likely to change. You may still want workflows for these lists if you are continuously making manual changes to the lists, but most of the time you'll only want workflows for lists created by saving a search.
Workflows can be configured on the "Workflow" tab of the List page. See the Workflow documentation for a detailed description of the actions that can be configured.
Product Lists
The following sections describe functionality related to a list of Products. Product lists are only available to the Enterprise plan as part of the Product Search feature.
Creating A Product List By Saving a Search
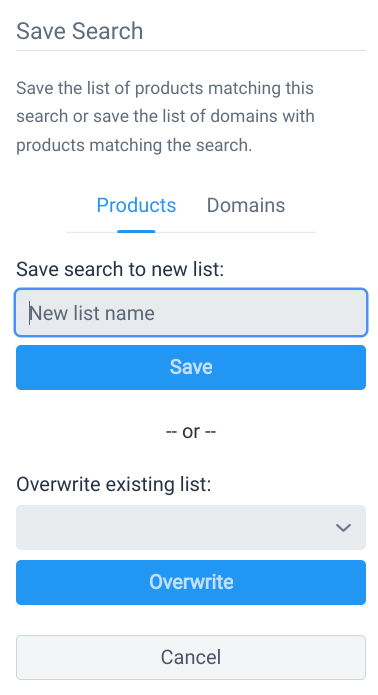
To create a product list from a product search, click on the star icon at the top of the search filters on the Products page.
The resulting list will be dynamic, meaning that the products within the list change as the data changes.
You'll be asked to provide a name for the new List or you may choose to overwrite an existing saved search.
You may also choose to save the Products or Domains associated with the search. Select the Domains tab to save domains associated with the search and then provide a minimum threshold of products to match. As an example, if your product search matches "socks" and you'd like to create a list of domains that sell at least 3 different products matching "socks", then set "Minimum Products" to 3.
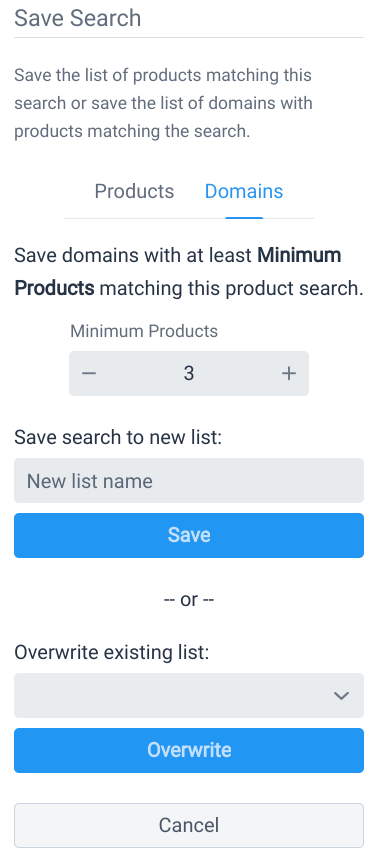
Saving the list of domains that match a product search allows you to define workflows against the list. Workflows are automated actions that are run after our weekly data updates.
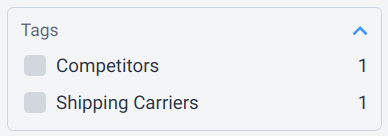
Organizing Lists With Tags
If you have a lot of lists, it can sometimes be hard to keep track of them all. Apply tags to lists to keep them organized and make them easier to find.
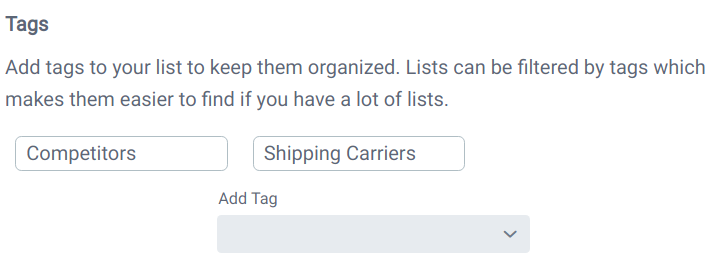
To add a new tag to a list, enter the tag name and press the Enter/Return key.
To remove a tag, just hover your mouse of the tag name and click the red X icon.
Once you've added a tag, you'll see a new option to filter lists by tags.